Charging System (Service Information): Generator: Removal: Removal
- DISCONNECT CABLE FROM NEGATIVE BATTERY TERMINAL
- REMOVE V-BANK COVER SUB-ASSEMBLY
. Refer to REMOVAL - Step 22
- REMOVE AIR CLEANER HOSE ASSEMBLY
. Refer to REMOVAL - Step 8
- REMOVE AIR CLEANER ASSEMBLY
. Refer to REMOVAL - Step 24
- REMOVE FRONT FENDER SPLASH SHIELD SUB-ASSEMBLY LH
. Refer to REMOVAL - Step 1
- REMOVE FRONT FENDER SPLASH SHIELD SUB-ASSEMBLY RH
. Refer to REMOVAL - Step 2
- REMOVE NO. 1 ENGINE UNDER COVER SUB-ASSEMBLY
. Refer to REMOVAL - Step 17
- REMOVE FAN & GENERATOR V BELT
. Refer to REMOVAL - Step 5
- REMOVE FRONT FENDER APRON SEAL FRONT RH
. Refer to REMOVAL - Step 5
- DISCONNECT VANE PUMP ASSEMBLY
. Refer to REMOVAL - Step 35
- DISCONNECT OIL COOLER PIPE ASSEMBLY
. Refer to REMOVAL - Step 6
- REMOVE GENERATOR ASSEMBLY
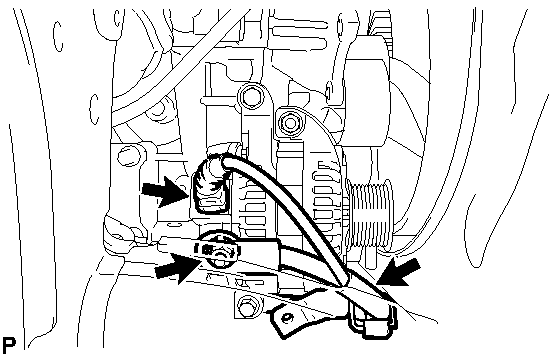
- Disconnect the generator connector.
 Courtesy of © TOYOTA, LICENSE AGREEMENT TMS1002
- Remove the terminal cap and nut, and disconnect the generator wire.
- Remove the bolt and wire harness bracket from the generator.
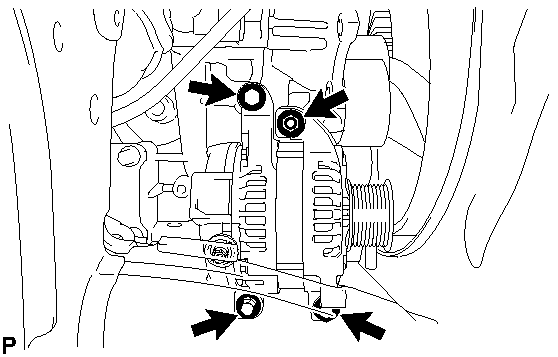
- Remove the 3 bolts, nut and generator.
 Courtesy of © TOYOTA, LICENSE AGREEMENT TMS1002