Repair Procedures: Removal
- Release the residual pressure in fuel line. Refer to RELEASE RESIDUAL PRESSURE IN FUEL LINE .
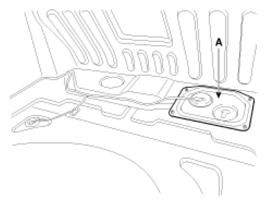
- Remove the fuel pump service cover (A) in the trunk.
 Courtesy of KIA MOTORS AMERICA, INC.
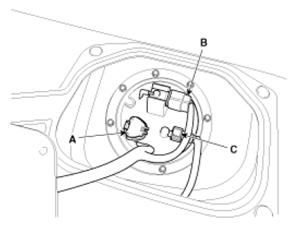
- Disconnect the fuel pump connector (A) and the fuel tank pressure sensor connector (B).
- Disconnect the fuel feed tube quick connector (C).
 Courtesy of KIA MOTORS AMERICA, INC.
- Lift the vehicle and support the fuel tank with a jack.
- Remove the center muffler assembly. Refer to MUFFLER
.
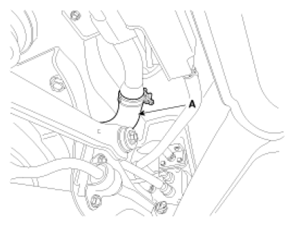
- Disconnect the fuel filler hose (A).
 Courtesy of KIA MOTORS AMERICA, INC.
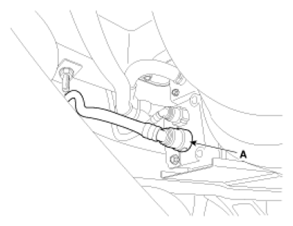
- Disconnect the vapor hose quick-connector (A).
 Courtesy of KIA MOTORS AMERICA, INC.
- Remove the parking brake line (A).
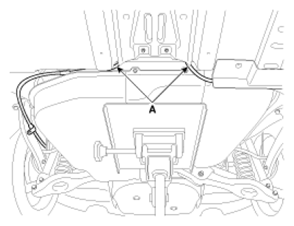 Courtesy of KIA MOTORS AMERICA, INC.
- Remove the fuel tank band installation nut (A).
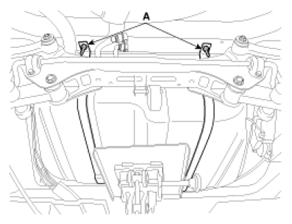 Courtesy of KIA MOTORS AMERICA, INC.
- Remove the fuel tank after removing the fuel tank bands (A) as shown below.
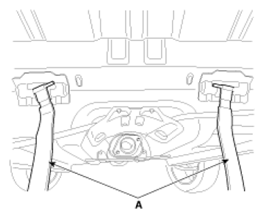 Courtesy of KIA MOTORS AMERICA, INC.