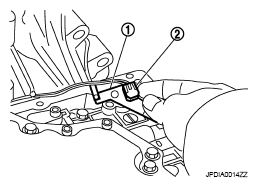
- Install bracket (1) to A/T fluid temperature sensor 2 (2).
 Courtesy of NISSAN MOTOR CO., U.S.A.
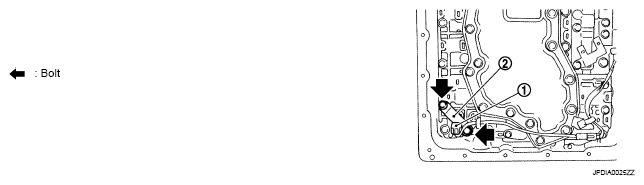
- Install A/T fluid temperature sensor 2 (1) with bracket (2) in control valve with TCM. Tighten A/T fluid temperature sensor 2 bolts to the specified torque.
 Courtesy of NISSAN MOTOR CO., U.S.A.
CAUTION:
Adjust bolt hole of bracket to bolt hole of control valve with TCM.
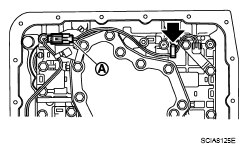
- Connect A/T fluid temperature sensor 2 connector (A).
- Engage A/T fluid temperature sensor 2 harness with terminal clip (<=).
 Courtesy of NISSAN MOTOR CO., U.S.A.
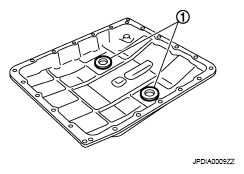
- Install magnets (1) in oil pan.
- Install oil pan gasket to oil pan.
CAUTION:
- Do not reuse oil pan gasket.
- Install it in the direction to align hole positions.
- Completely remove all moisture, oil and old gasket, etc. from oil pan gasket mounting surface.
 Courtesy of NISSAN MOTOR CO., U.S.A.
- Install oil pan (2) (with oil pan gasket) and clips (1) to transmission case.
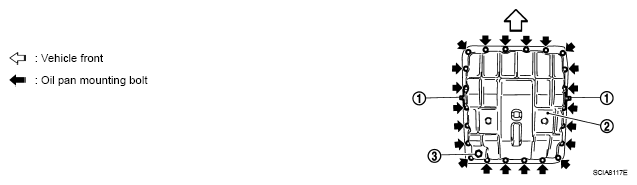 Courtesy of NISSAN MOTOR CO., U.S.A.
CAUTION:
- Install it so that drain plug (3) comes to the position as shown in the figure.
- Be careful not to pinch harnesses.
- Completely remove all moisture, oil and old gasket, etc. from oil pan mounting surface.
- Tighten oil pan mounting bolts to the specified torque in numerical order shown in the figure after temporarily tightening them. Tighten oil pan mounting bolts to the specified torque.
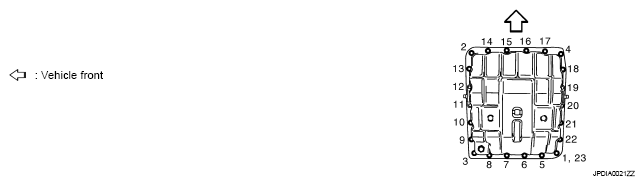 Courtesy of NISSAN MOTOR CO., U.S.A.
CAUTION:
Do not reuse oil pan mounting bolts.
- Install drain plug to oil pan. Tighten drain plug to the specified torque.
CAUTION:
Do not reuse drain plug gasket.
- Install bracket (2) to transmission assembly.
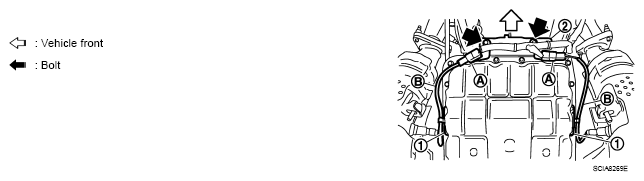 Courtesy of NISSAN MOTOR CO., U.S.A.
- Install heated oxygen sensor 2 harness (B) to clips (1).
- Connect heated oxygen sensor 2 harness connectors (A).
- Install exhaust mounting bracket. Refer to
"EXPLODED VIEW
".
- Pour ATF into A/T assembly. Refer to
"CHANGING ".
- Connect the battery cable to the negative terminal.