Brake Light Failure Sensor Test
- First make sure the brake lights come on when the brake pedal is pressed.
- If all the brake lights come on, go to step 2.
- If one of the brake lights does not come on, check whether the bulb is blown. If the bulb is OK, go to step 2.
- If none of the brake lights come on, check the brake light circuit (see CIRCUIT DIAGRAM - BRAKE LIGHTS
).
- Open the trunk lid, and remove the left trunk side trim (see TRIM REMOVAL/INSTALLATION - TRUNK AREA
).
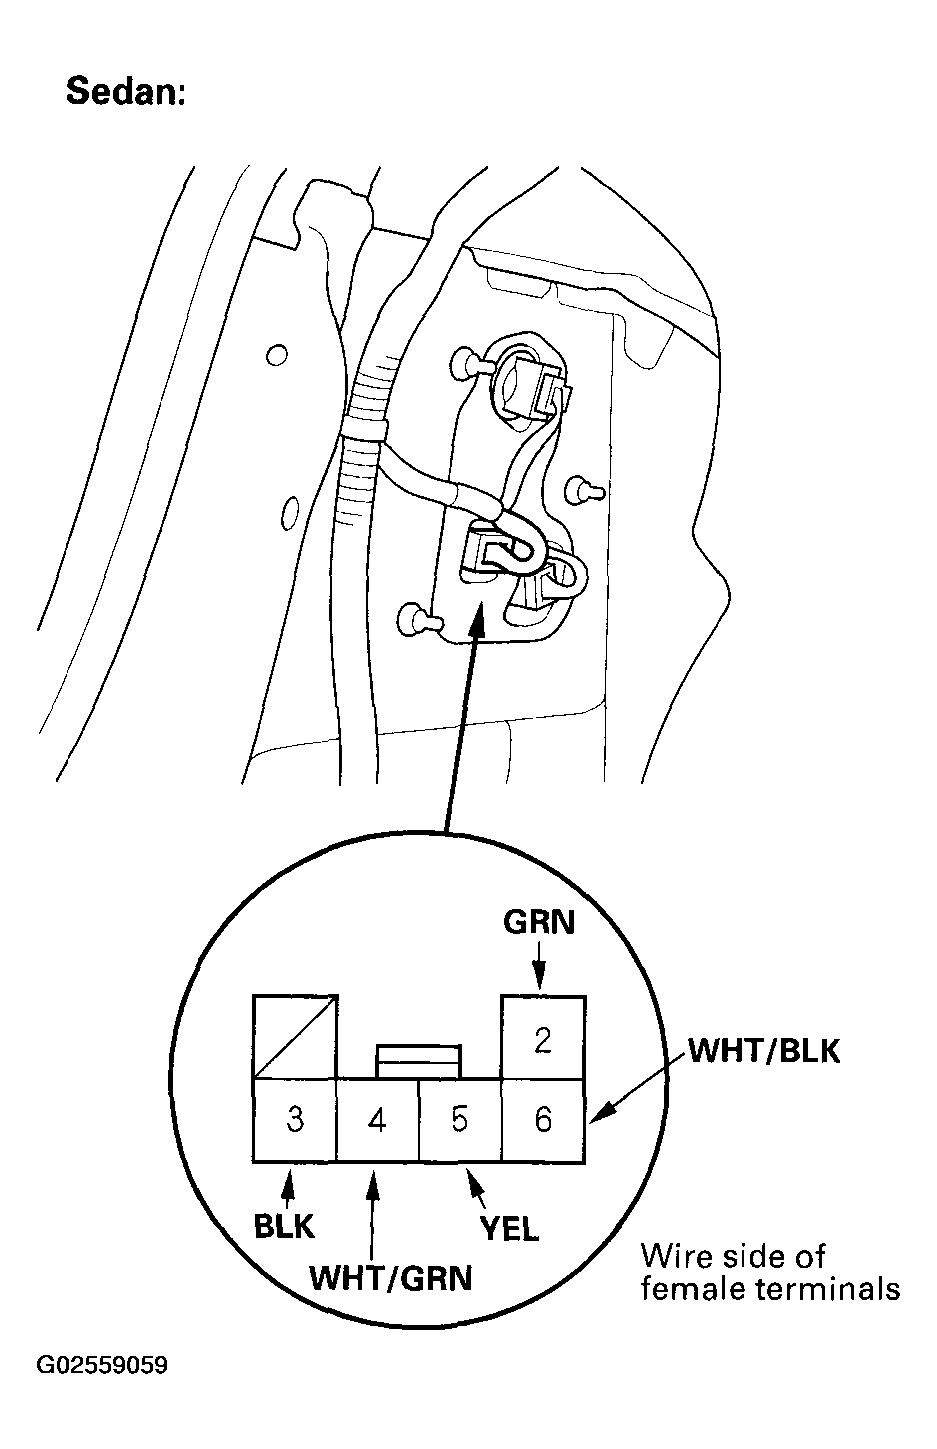
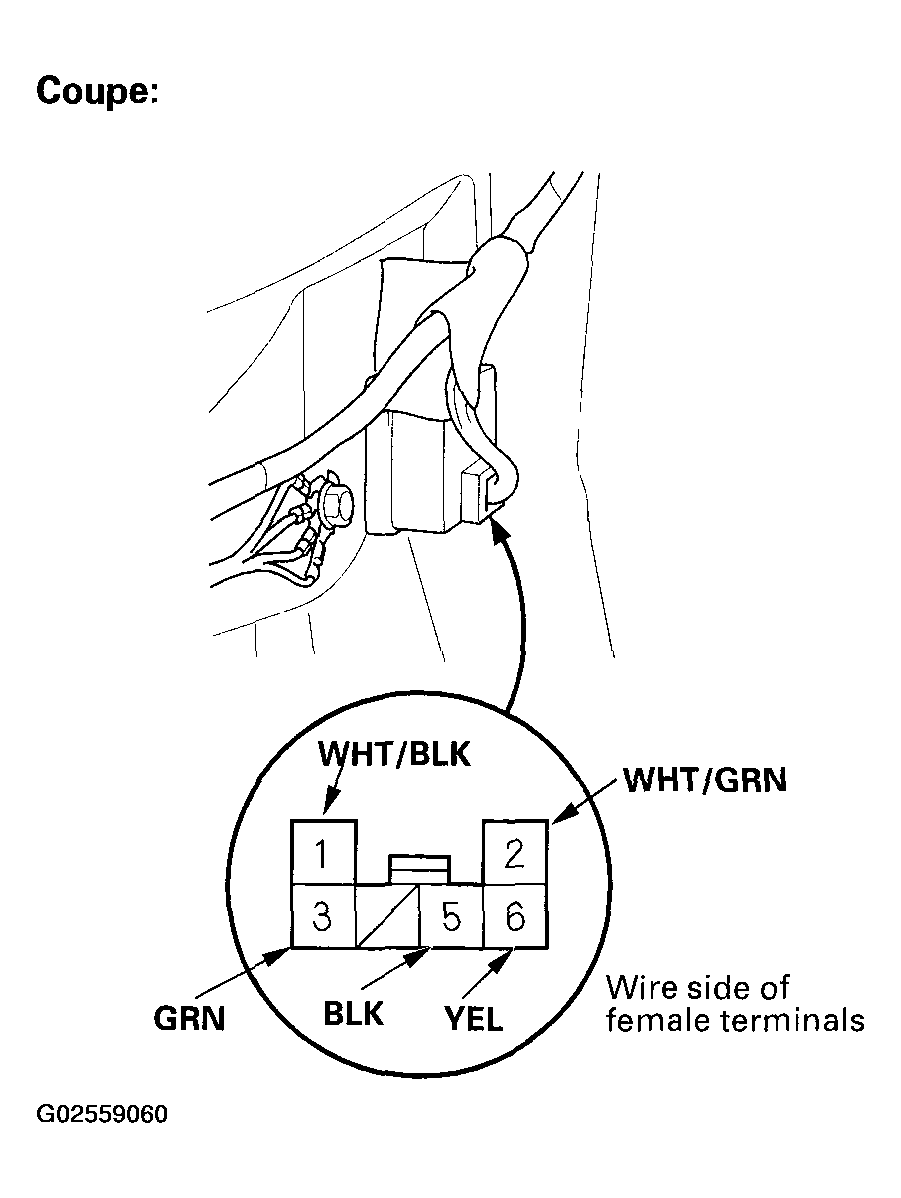
- Make sure the BRAKE LAMP light in the safety indicator does not come on and stay on when the 6P connector is disconnected and the engine is running. If the BRAKE LAMP light in the safety indicator comes on and stays on, check for:
- a short to body ground in the WHT/GRN wire between the safety indicator and the No. 4 (Sedan) or 2 (Coupe) terminal of the failure sensor.
 Courtesy of AMERICAN HONDA MOTOR CO., INC.
 Courtesy of AMERICAN HONDA MOTOR CO., INC.
- a faulty safety indicator circuit (printed circuit board) in the gauge assembly.
- Reconnect the 6P connector. Make sure the BRAKE LAMP light in the safety indicator comes on and goes off when the No. 3 (Sedan) or 5 (Coupe) terminal of the 6P connector is grounded, the brake pedal is pressed, and the engine is running.
- If the BRAKE LAMP light does not go off, replace the failure sensor.
- If the BRAKE LAMP light goes off, check for:
- a poor ground (G601).
- an open in the BLK wire.