Clutch Assembly: Removal
- Remove battery, battery tray and air cleaner assembly. Drain transaxle oil. Disconnect tension rod located above transaxle mounting bracket.
- Disconnect control cables, speedometer cable and electrical connections at transaxle. Remove clutch release cylinder with line connected and wire aside.
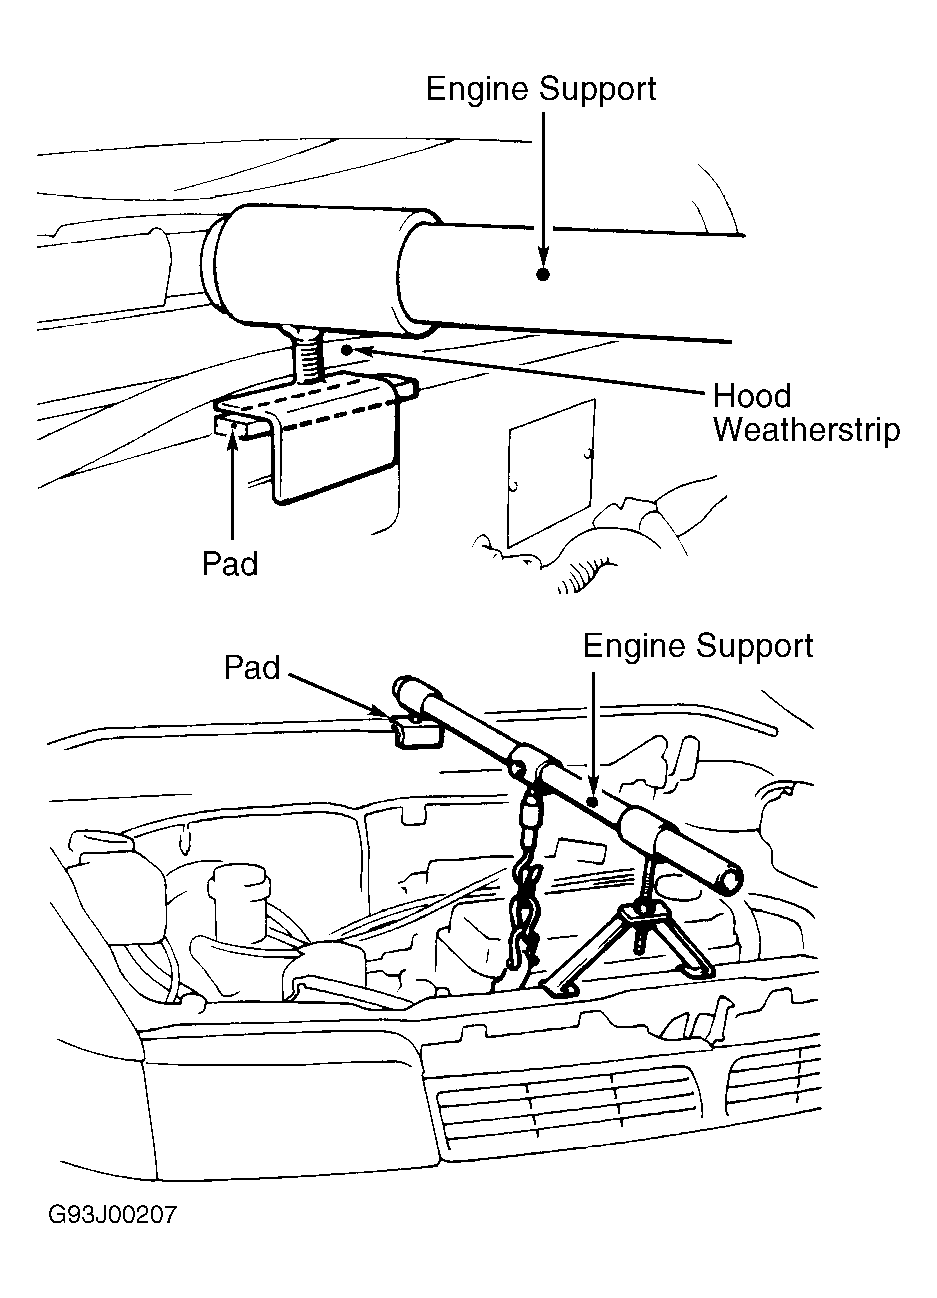
- Remove starter motor, with harness connected, and wire aside. Support engine with Engine Support (MB991191). See Fig 1
. Remove upper transaxle-to-engine bolts and transaxle mounting bracket bolt. Raise and support vehicle. Loosen, but do not remove, nuts on ball joints and tie rod ends. Using Remover (MB991113), separate ball joints and tie rod ends from steering knuckles. Remove nuts and remove ball joints and tie rod ends. Remove stabilizer bar.
- Disengage the axle shafts and wire aside. Refer to the AXLE SHAFT - FRONT
article in DRIVE AXLES. DO NOT
damage oil seal. Plug shaft openings in transaxle. Remove lower transaxle brackets.
- Remove bellhousing cover. Support transaxle with jack. Remove remaining transaxle-to-engine bolts. Remove transaxle assembly. Insert a clutch aligning tool to prevent pressure plate and clutch disc from dropping during removal.
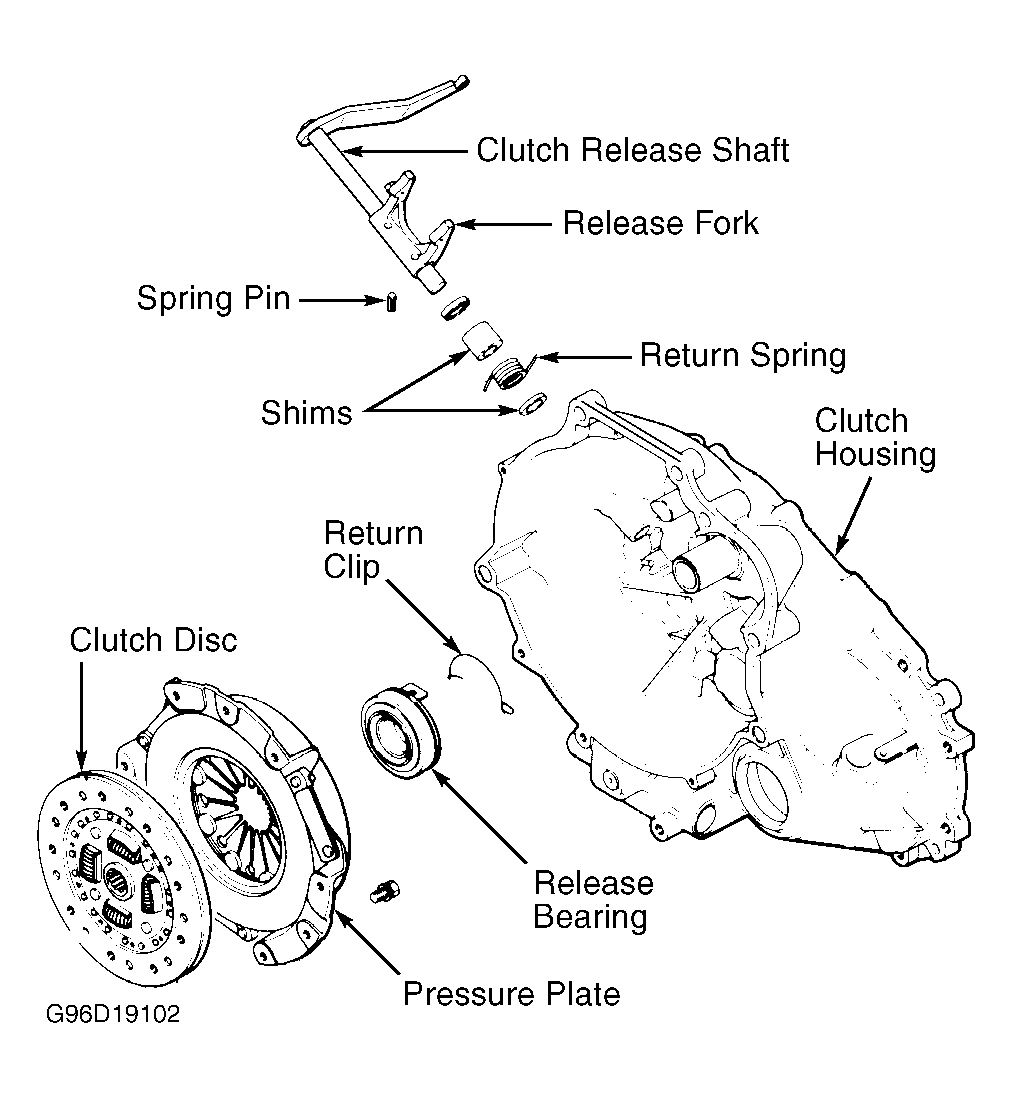
- Loosen pressure plate bolts gradually in a crisscross pattern to avoid warping pressure plate flange during removal. Remove pressure plate and clutch disc. See Fig 2
.
 Courtesy of MITSUBISHI MOTOR SALES OF AMERICA.
 Courtesy of MITSUBISHI MOTOR SALES OF AMERICA.