Module, Power Liftgate Control: Installation: Installation
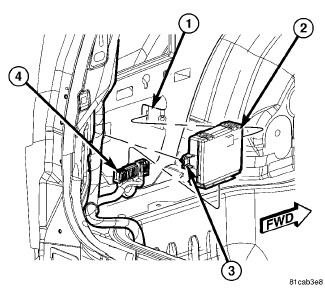 Courtesy of CHRYSLER GROUP, LLC
- Position the power liftgate control module (2) into the vehicle.
- Insert the mounting tab into the locating slot on the inner quarter panel (1).
- Install the power liftgate control module push pin style retainer (3).
- Connect the wire harness connectors (4) to the power liftgate control module.
- If equipped, install the subwoofer. Refer to SPEAKER, REMOVAL
.
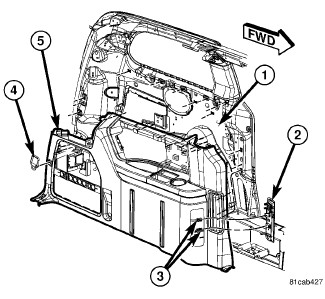 Courtesy of CHRYSLER GROUP, LLC
- Install the left quarter trim panel (5).
- Position the left quarter trim panel (5) into the vehicle.
- Connect the auxiliary power outlet and power inverter (2) wire harness connectors (3) (if equipped).
- Align the trim panel over the retaining slots on the inner quarter panel (1) and firmly snap into place.
- Install the six quarter trim retaining screws.
- Install the third row upper turning loop anchor bolt.
- Install the third row lower seat belt webbing anchor (4).
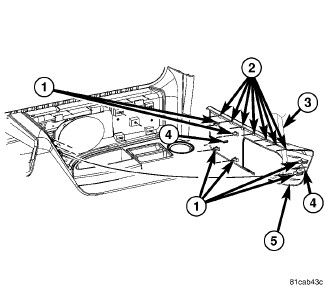 Courtesy of CHRYSLER GROUP, LLC
- Install the quarter trim bolster (5).
- Position the quarter trim bolster (5) into the vehicle and slide the rear seat belt (3) into the slot.
- Align the locating tabs (4) with the holes in the left quarter trim panel.
- Carefully engage the quarter trim bolster upper retaining tabs (2) by inserting them into the left quarter trim panel and swinging the bottom edge of the bolster towards the left quarter trim.
- Push the quarter trim bolster into the left quarter trim panel until the retaining clips (1) are fully seated.
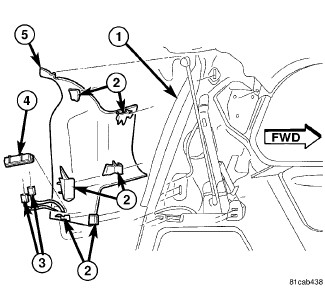 Courtesy of CHRYSLER GROUP, LLC
- Install the upper D-pillar trim.
- Position the upper D-pillar trim into the liftgate opening.
- Connect the power liftgate D-Pillar switch and third row power folding seat switch electrical connectors (3) (if equipped).
- Carefully engage the upper D-pillar trim end tab (5) into the rear header trim plate.
- Push the upper D-pillar trim onto the D-Pillar to engage the trim retaining clips (2).
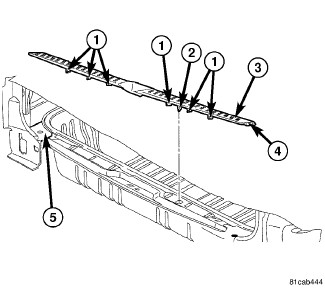 Courtesy of CHRYSLER GROUP, LLC
- Install the liftgate scuff plate.
- Position the liftgate scuff plate (3) into the liftgate opening.
- Carefully engage the scuff plate end tabs (4) into the left and right quarter trim panels (5).
- Push the liftgate scuff plate down onto the liftgate opening to engage the scuff plate retaining clips (1).
- Connect the battery negative cable.
- Using an appropriate scan tool, check and erase any power liftgate control module diagnostic trouble codes.
- Perform the power liftgate learn cycle. Refer to STANDARD PROCEDURE
.
- Verify power liftgate system operation.