Body & Frame: Windows: Interior/Exterior: Sunroof: Assembly-Module: Installation
 Courtesy of DAIMLERCHRYSLER CORP.
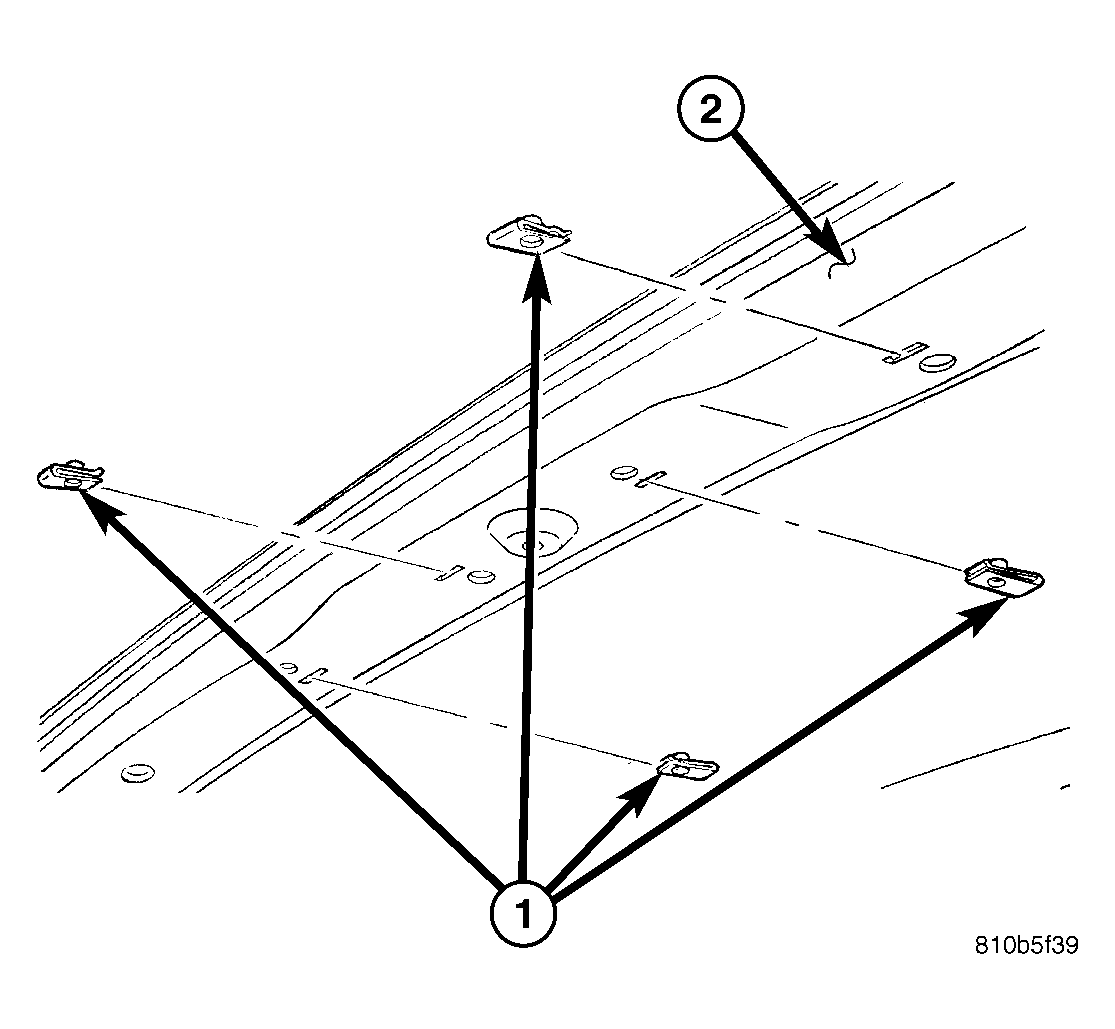
- Verify that u-nuts (1) are in position in the roof bow #2 (2).
- Verify that glass panel is loose and slightly retracted.
 Courtesy of DAIMLERCHRYSLER CORP.
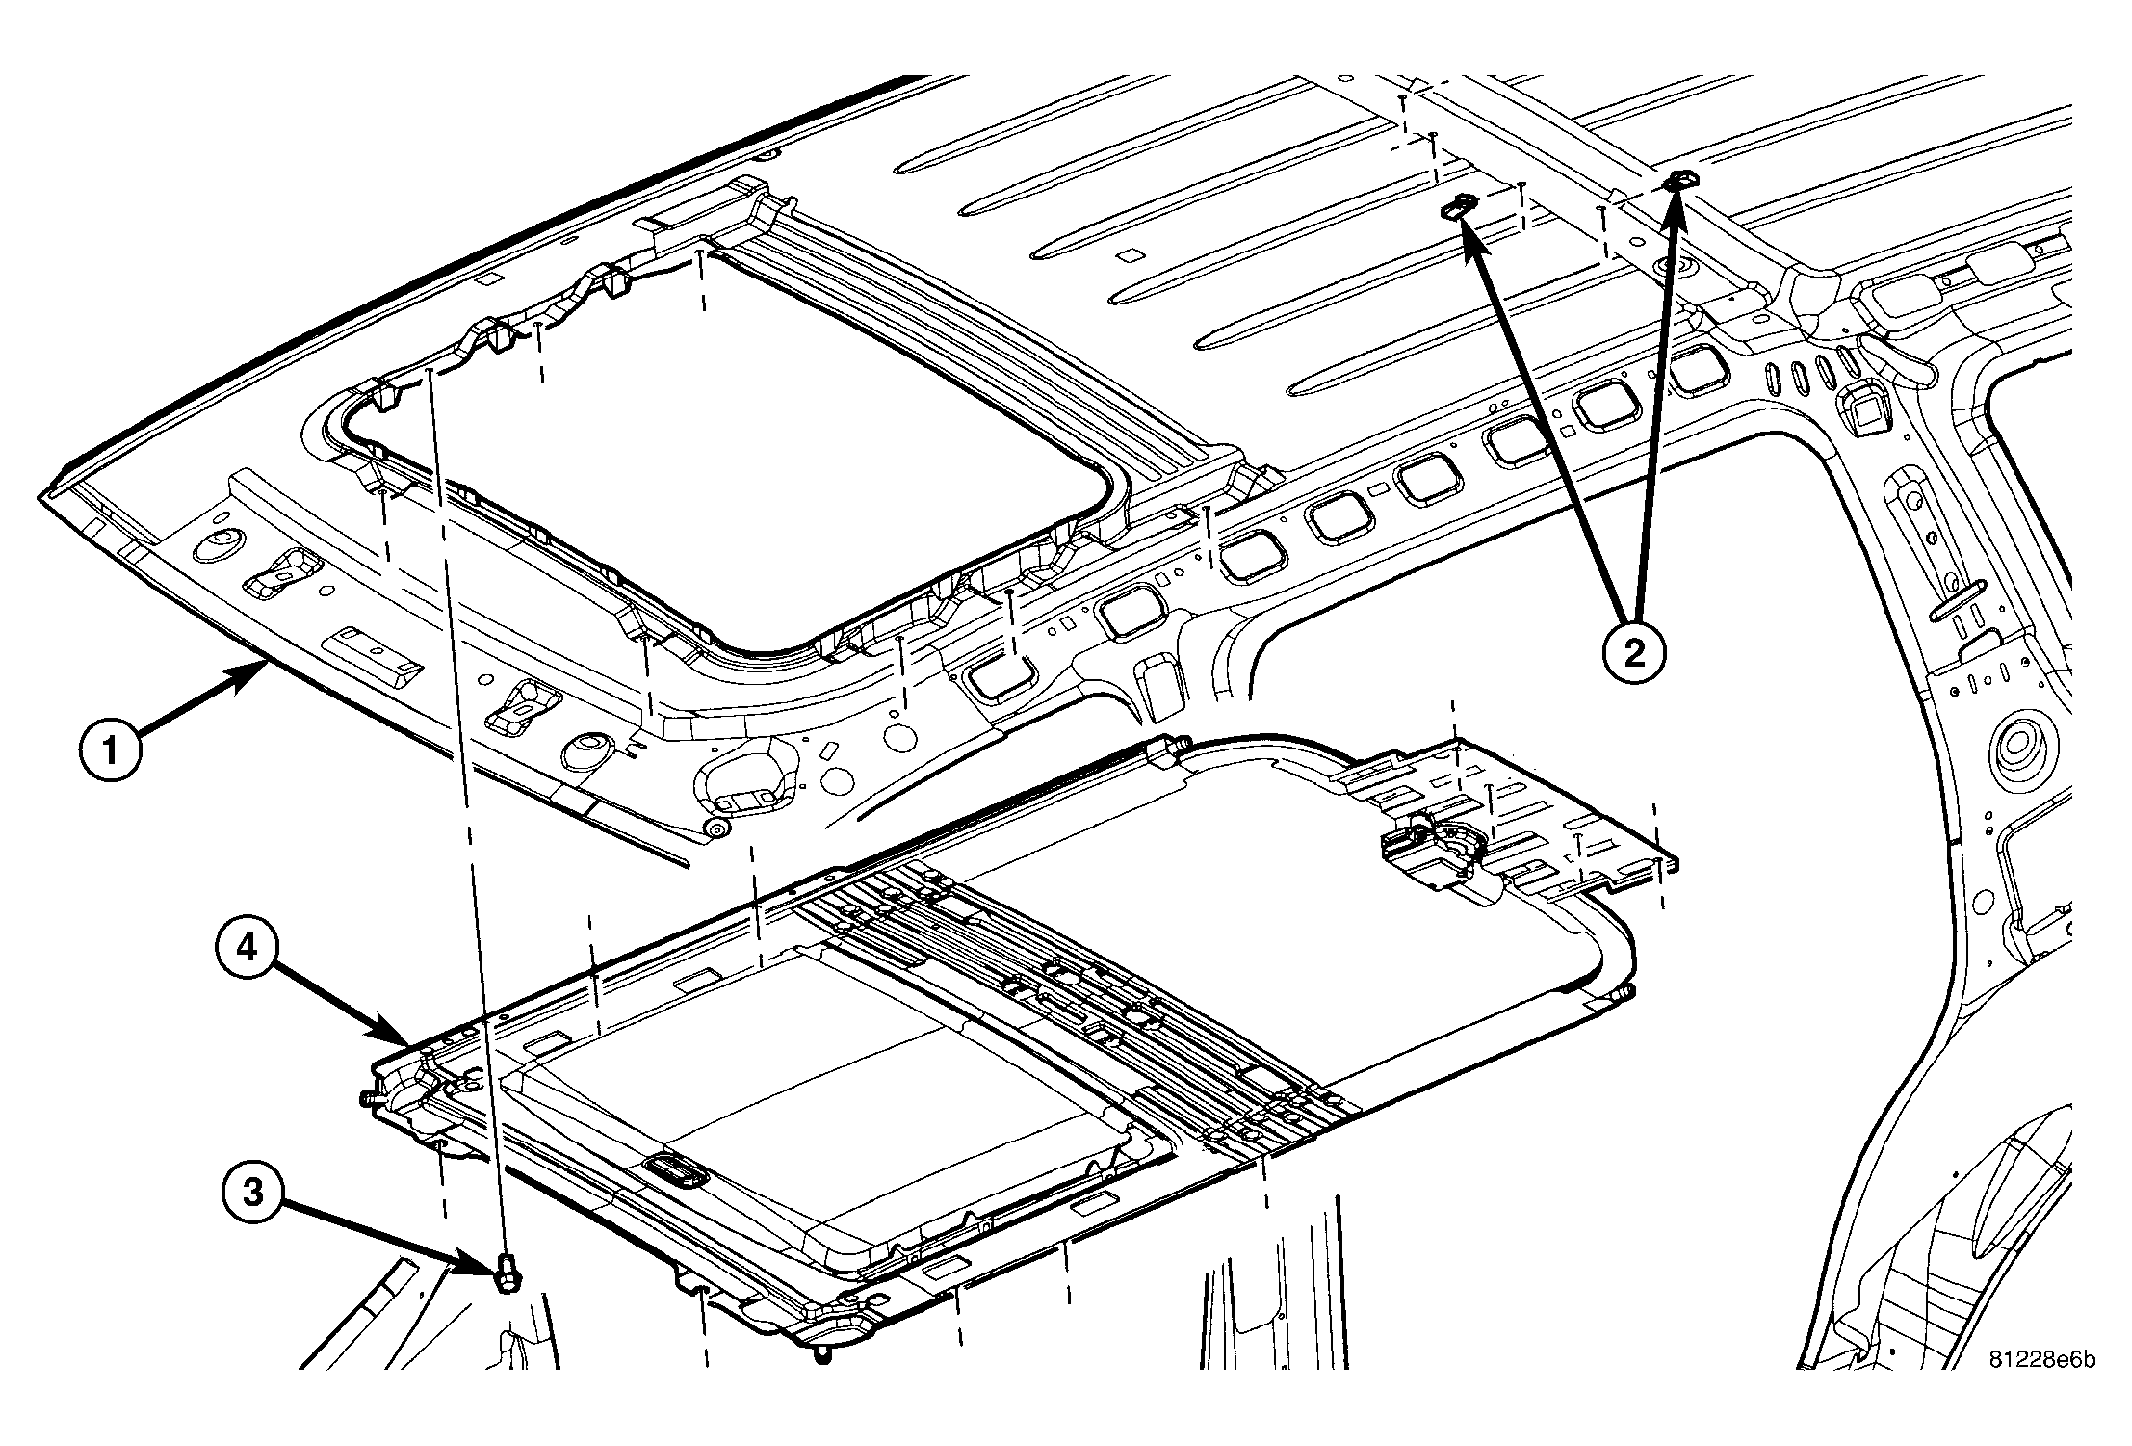
- Raise sunroof module assembly (4) and guide it carefully into position.
 Courtesy of DAIMLERCHRYSLER CORP.
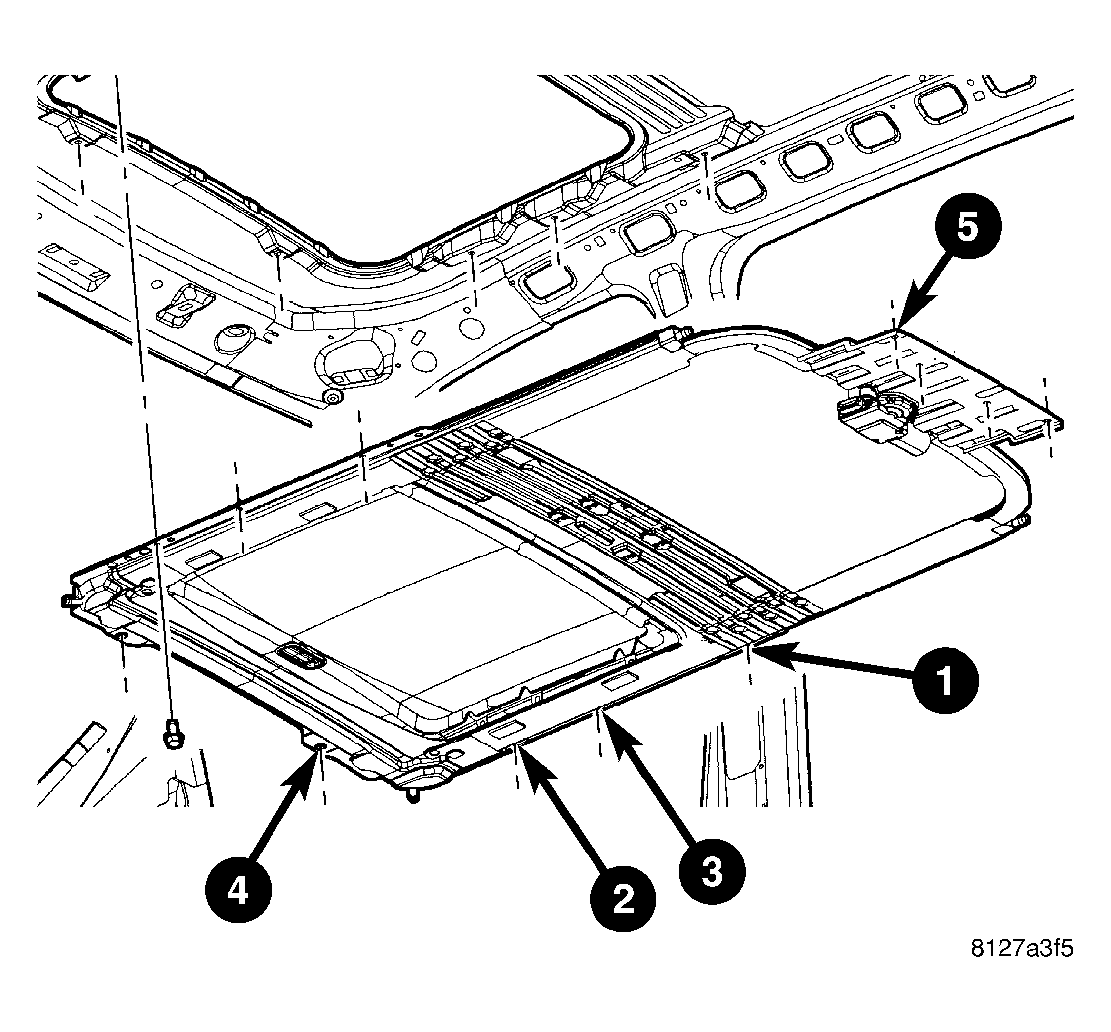
- While supporting the sunroof assembly, start the 12 attaching screws, three along each side rail, two along the front trough and four along the motor bracket.
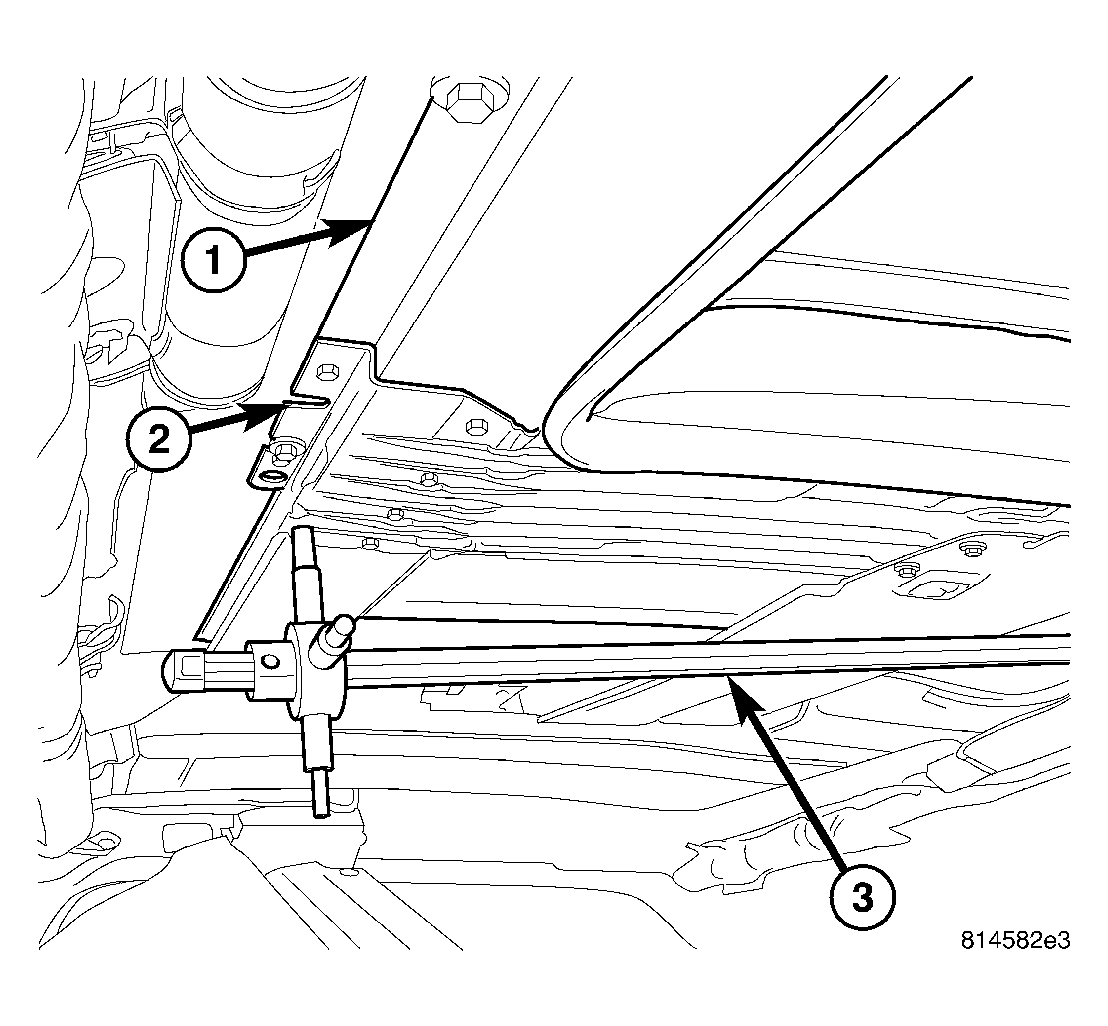
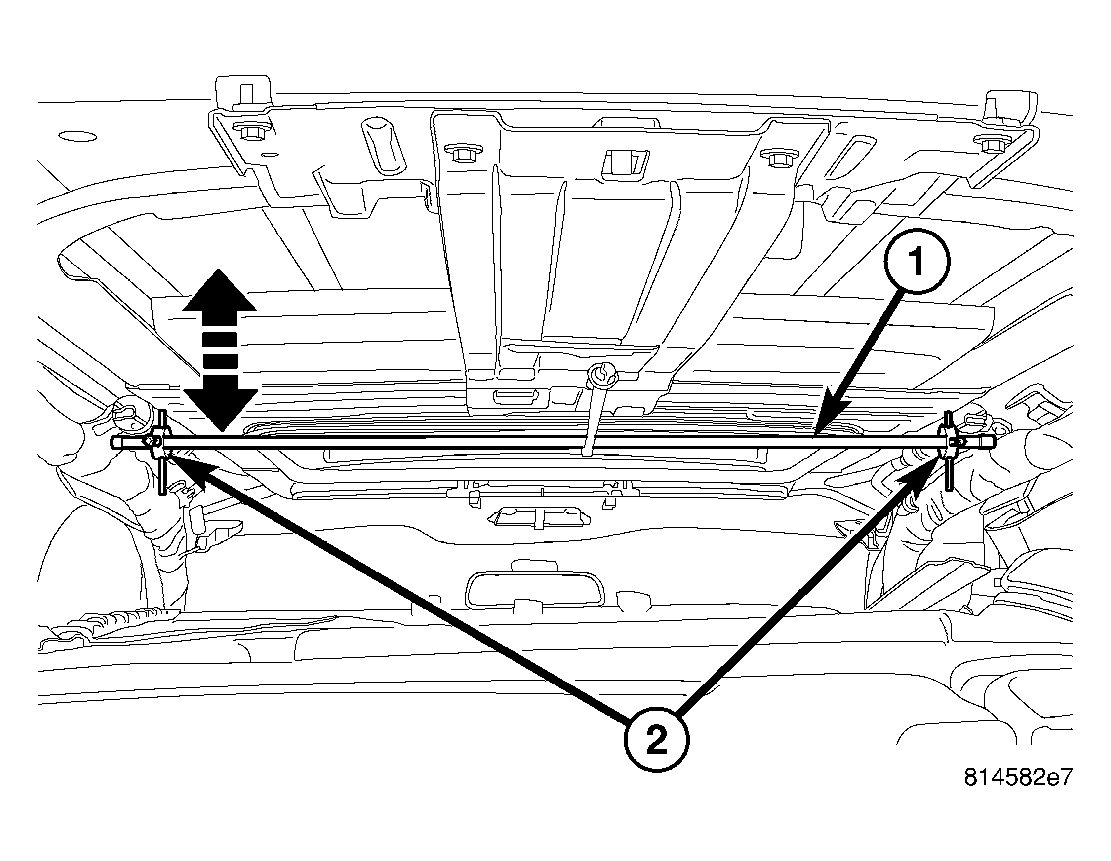
- Position special tool # 9582 pins (3) through the locating holes (2) and confirm the module assembly (1) is properly aligned.
 Courtesy of DAIMLERCHRYSLER CORP.
- Tighten the attaching screws to 6 N.m (53 in. lbs.) using the sequence shown in Fig 4.
 Courtesy of DAIMLERCHRYSLER CORP.
- Remove the alignment tool (1) from the alignment holes (2).
 Courtesy of DAIMLERCHRYSLER CORP.
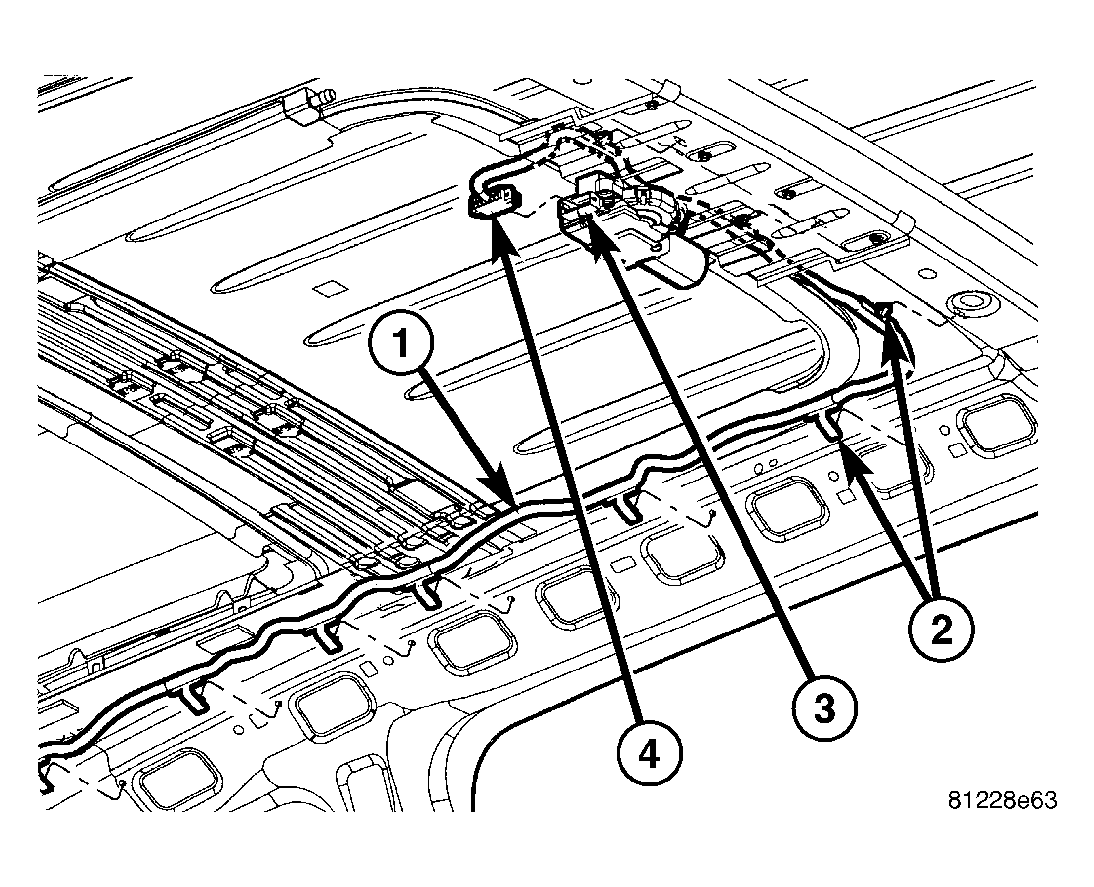
- Connect the electrical connector (4).
 Courtesy of DAIMLERCHRYSLER CORP.
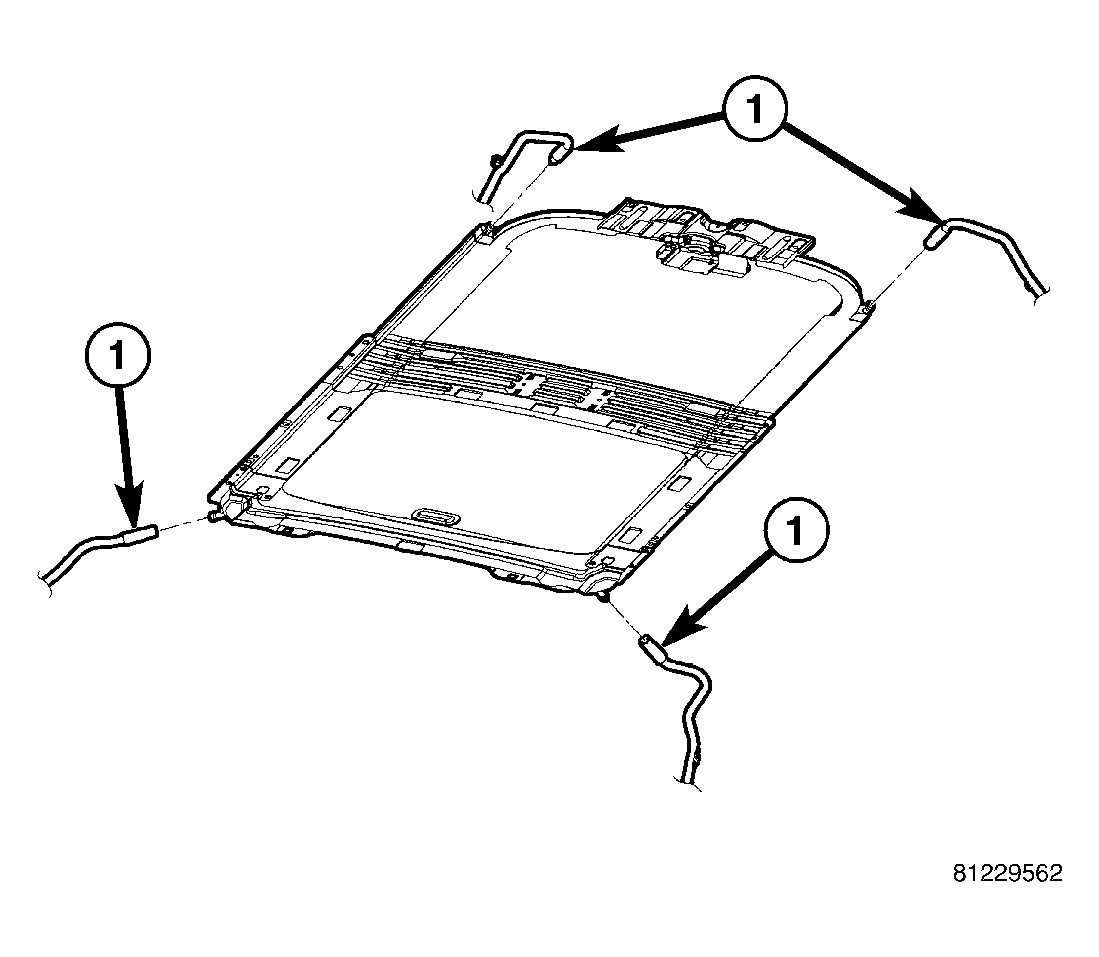
- Connect the drain tubes to the sunroof (1).
 Courtesy of DAIMLERCHRYSLER CORP.
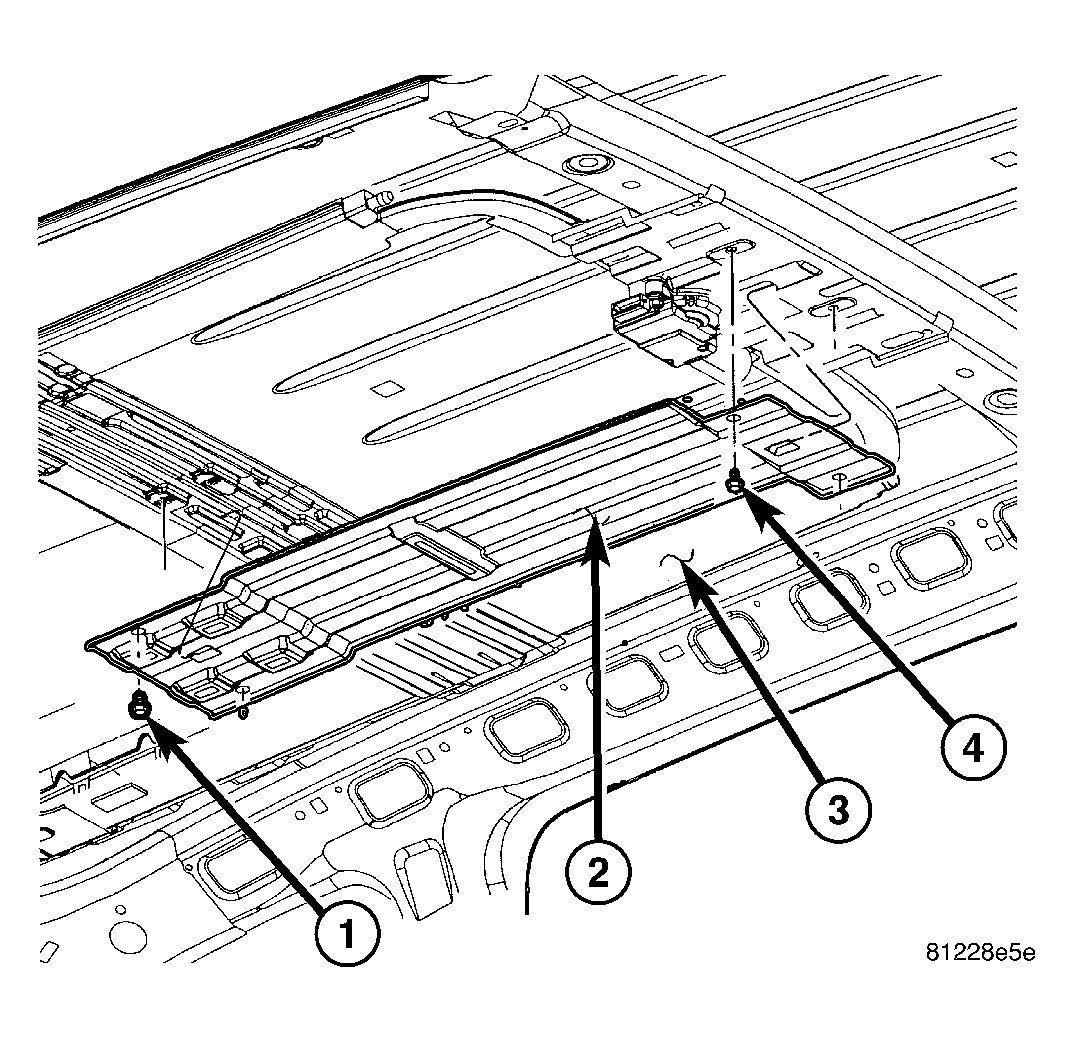
- Position the video display support bracket (2), if equipped, and install the bolts (1 & 4). Tighten the bolts to 6 N.m (53 in. lbs.).
- Connect battery negative cable.
- Test sunroof operation, adjust if necessary. (Refer to BODY/SUNROOF/GLASS PANEL - ADJUSTMENTS)
- Install headliner. (Refer to BODY/INTERIOR/HEADLINER - INSTALLATION)